How to debug CSS problems?
Maria Skrzypek-Markiewicz | 2023-08-29Styling in CSS is said to be very fast and intuitive. Well, it can be true as long as everything works properly. Do you want to make a button red? One command, and it's red. Want to make it bigger? Another one, and it's bigger. Want to make the text inside blue? One adjustment, and... It's still black. If you've ever encountered a situation like this, you should be able to deal with it after reading this article.
 Image by vectorjuice on Freepik
Below are a few steps you should go through to debug your CSS problems:
1. Make sure you are trying to style the right HTML element
It can sound funny, but we often get confused by why our styles aren't working when trying to style a wrong HTML element. To quickly test if we are targeting the correct item, one can write a trivial style rule (e.g. background: red;) and verify that the element we are interested in turns red on the web page.
2. Check if your property is not being overwritten by another one
Sometimes, your property might get overwritten by a more important one. There are two possible reasons for this situation:
- Look through your CSS file - you might be styling the same element twice.
- A selector you are utilizing has lower specificity than another styling the same element. For example, you might be employing a class selector (
.) while in another part of your project or in a library you're using, an ID selector (#) gets used. If you want to learn more about the specificity of CSS selectors, I recommend you read this article: https://developer.mozilla.org/en-US/docs/Web/CSS/Specificity. You can also compare the specificity of your selectors on this site: https://specificity.keegan.st/.
But how can you identify that this is a problem with selector specificity?
You can observe this in the browser's DevTools (Developer Tools). To open them, right-click and select the "inspect" tool. Then, choose the "Elements" tab.

In the screenshot above, you can see that the command intended to change the background to red is overwritten by the command changing it to blue because the second one has the "important" flag.
3. Verify if CSS property which you're using is supported by your browser
Unfortunately, some browsers may not support given CSS properties. To ensure you can use a specific property, check its compatibility here: https://caniuse.com/.
4. What if you've checked everything and it still does't work as you want?
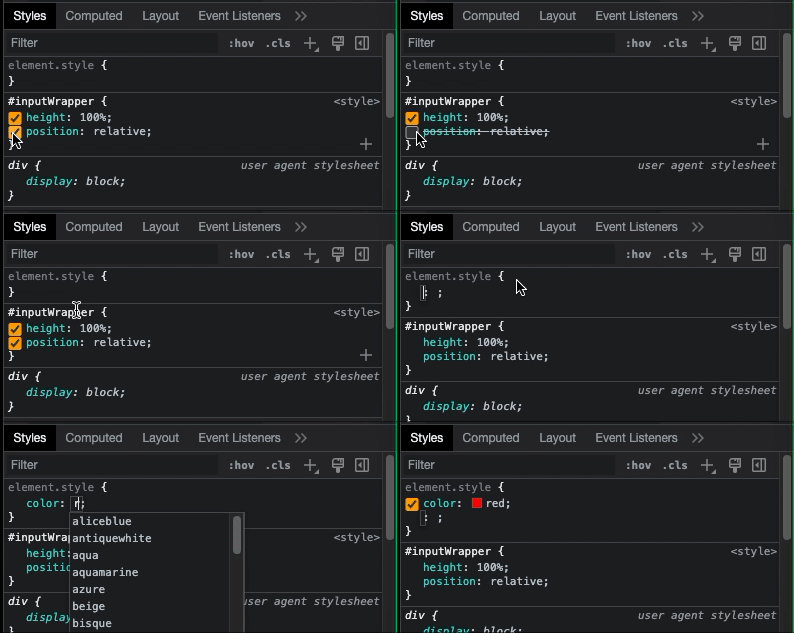
Sometimes, even after going through the first three steps, you might still have no idea why your CSS rule isn't doing what it's supposed to do. In such cases, the DevTools may pave the way to debug your problem. It's helpful to know that you can inspect every single detail of your website appearance via the DevTools. So, set aside the code for a moment and focus solely on DevTools. You can add new properties and toggle existing ones on and off over there.

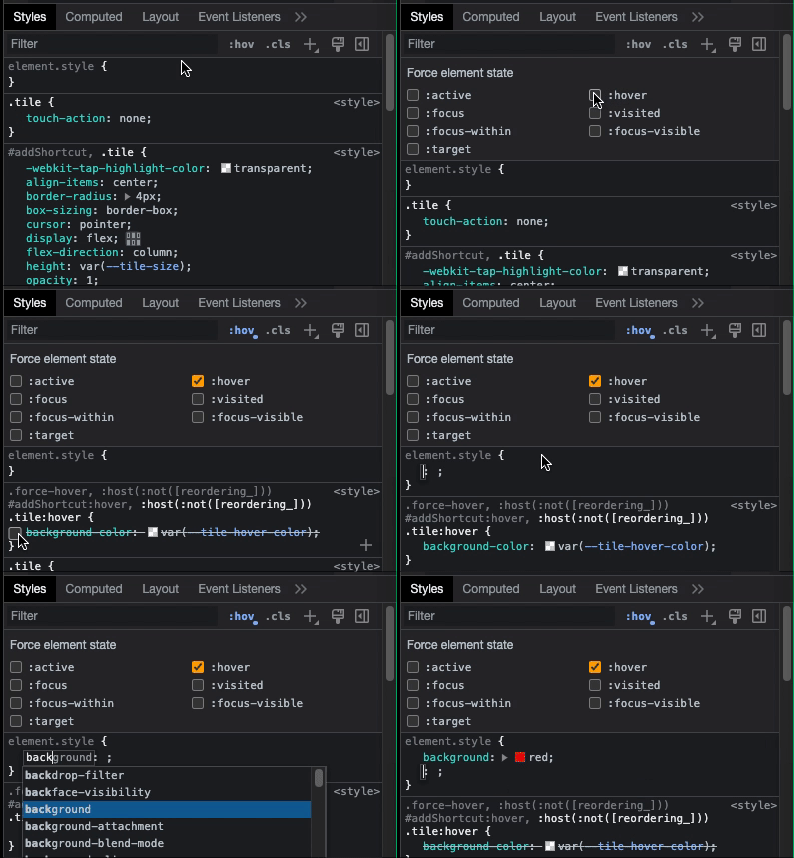
You can also explore or experiment with styles that become active after hovering over the HTML element.

Don't worry about potentially creating a mess in your styles. After refreshing the page, all your changes will disappear:)
Remember that styles of other elements can also impact the item's look. For example, display: flex affects the element's children, not itself.
5. The Last Resort: Thorough Approach
If you're still unsure why your styles aren't working as intended, there's another method you can try. While it might seem tedious and time-consuming, it's highly effective. One needs the DevTools to be open to switch off all the styles for your element and its parent. Once you do it, enable each rule one at a time, starting with the malfunctioning element. This way, at some point, you will identify what is causing issues with your styling.
 Image by syarifahbrit on Freepik
This article aims to empower you with strategies to tackle any CSS problems you might encounter.
Remember that mastering CSS troubleshooting can make your web development journey smoother and more enjoyable. Happy debugging!
I hope this comprehensive guide aids you in resolving any CSS problems you come across.
