Power of source maps in Sentry
Szymon Borda | 2023-09-04With the rise of TypeScript and modern frameworks and libraries like React, Angular, or Vue, the JavaScript code that is being executed in the browser is not the same as the one written by the developer. The code is transpiled, minified, and bundled. This process makes the code more efficient and smaller in size. However, it makes debugging harder.
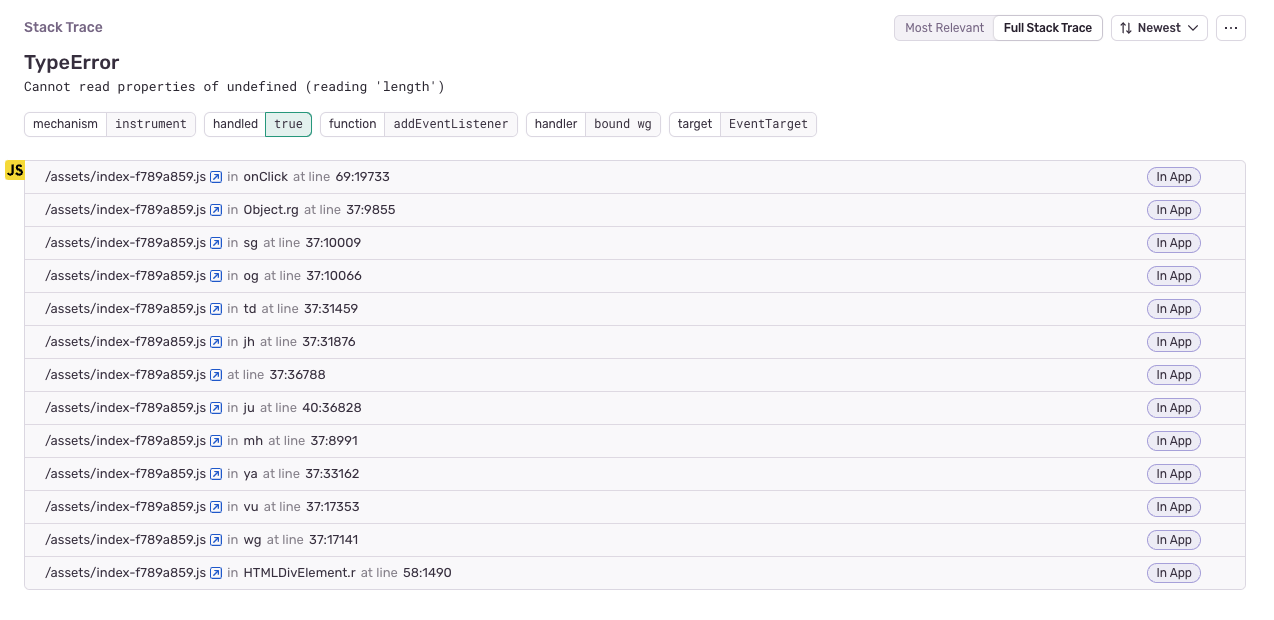
This is best visible in error reporting tools like Sentry. When an error occurs in the browser, Sentry collects the stack trace and sends it to the server. The stack trace contains the line numbers of the code that were executed. However, the code being executed is transpiled and minified, which sometimes makes it almost impossible to read and find the source of an error.

Source maps to the rescue
Source maps are the files that map transpiled code to the original source code. They are generated during the build process.
When an error occurs and a source map is present on the server, the browser downloads the source map and uses it to map the stack trace to the original source code. This is the default behavior in most of the modern JS frameworks' development environments, so you may not even know that you are using it regularly.

Implementing source maps in Sentry
While source maps that are read by a browser are great for local development, it is not a good idea to upload them directly to the production environment, as it would make your source code public, which is not ideal for commercial projects.
Fortunately, Sentry has a solution for that. It allows you to upload source maps to its server and use them to map the stack trace to the original source code, all without leaking your precious code to the public!
NOTE: Most of today's JS bundlers have official plugins for Sentry source maps, so you may not need to do it manually. I'm doing so to show you how it works under the hood, as it may be helpful for more complex projects.
1. Generate source maps
The first step is to generate source maps during the build process. In this example, I will use Vite, but the process is similar for other bundlers.
// https://vitejs.dev/config/
export default defineConfig({
  plugins: [react()],
  build: {
    sourcemap: 'hidden',
  }
})
You want to generate source maps in the hidden mode. This mode will not append the source mapping URLs to the transpiled code.
A source mapping URL looks something like this:
...
//# sourceMappingURL=index-f789a859.js.map
Leaving it within the transpiled code would result in users' browsers trying to fetch the source map from the given location. It would not work, as the source map won't be present on the server. It would also result in a lot of 404 errors in the console, which is less than optimal.
Sentry's uploading tool will link the source maps to the transpiled code automatically for us later.
2. Create a production build
Let's create a production build:
❯ yarn build
Now we should have a complete build with our transpiled code and source maps. Double-check that the source maps are present and the transpiled code files are lacking the "sourceMappingURL" comments.
3. Upload source maps to Sentry
Now we need to upload the source maps to Sentry. We will use Sentry CLI for that. It is a universal and framework-agnostic solution.
Firstly, let's install it globally:
❯ npm install -g @sentry/cli
Then you have to set all the required settings. The best way to do that is to use environment variables. You can read more about it in Sentry CLI docs.
❯ export SENTRY_AUTH_TOKEN="{your sentry auth token}"
❯ export SENTRY_ORG="{your sentry organization name}"
❯ export SENTRY_PROJECT="{your sentry project name}"
❯ export SENTRY_URL_PREFIX="~/"
Now it's time to upload the source maps alongside the build files to Sentry. The important thing here is to set the correct release flag. It should be the same as the one set in Sentry SDK in your application. The source maps are always linked to a specific release, so if you upload them with a different release name, they won't be used.
❯ sentry-cli sourcemaps upload --release="{release name}" {path to build folder}
As mentioned previously, it should automatically link the source maps to the transpiled code, and the prompt should look something like this:
❯ sentry-cli sourcemaps upload --release=v1.0.0 dist
> Found 2 files
> Analyzing 2 sources
> Analyzing completed in 0.059s
> Rewriting sources
> Rewriting completed in 0.016s
> Adding source map references
> Bundling completed in 0.077s
> Bundled 2 files for upload
> Bundle ID: f7db528f-7dd9-5018-8975-f980e739c52c
> Optimizing completed in 0.002s
> Uploading completed in 0.564s
> Uploaded files to Sentry
> Processing completed in 0.207s
> File upload complete (processing pending on server)
> Organization: szymon-borda-875172088
> Project: javascript-react
> Release: v1.0.0
> Dist: None
> Upload type: artifact bundle

Source Map Upload Report
  Minified Scripts
    ~/assets/index-f789a859.js (sourcemap at index-f789a859.js.map)
  Source Maps
    ~/assets/index-f789a859.js.map
Don't forget to remove the source maps before deployment!
❯ rm -rf dist/**/*.map
4. Final result
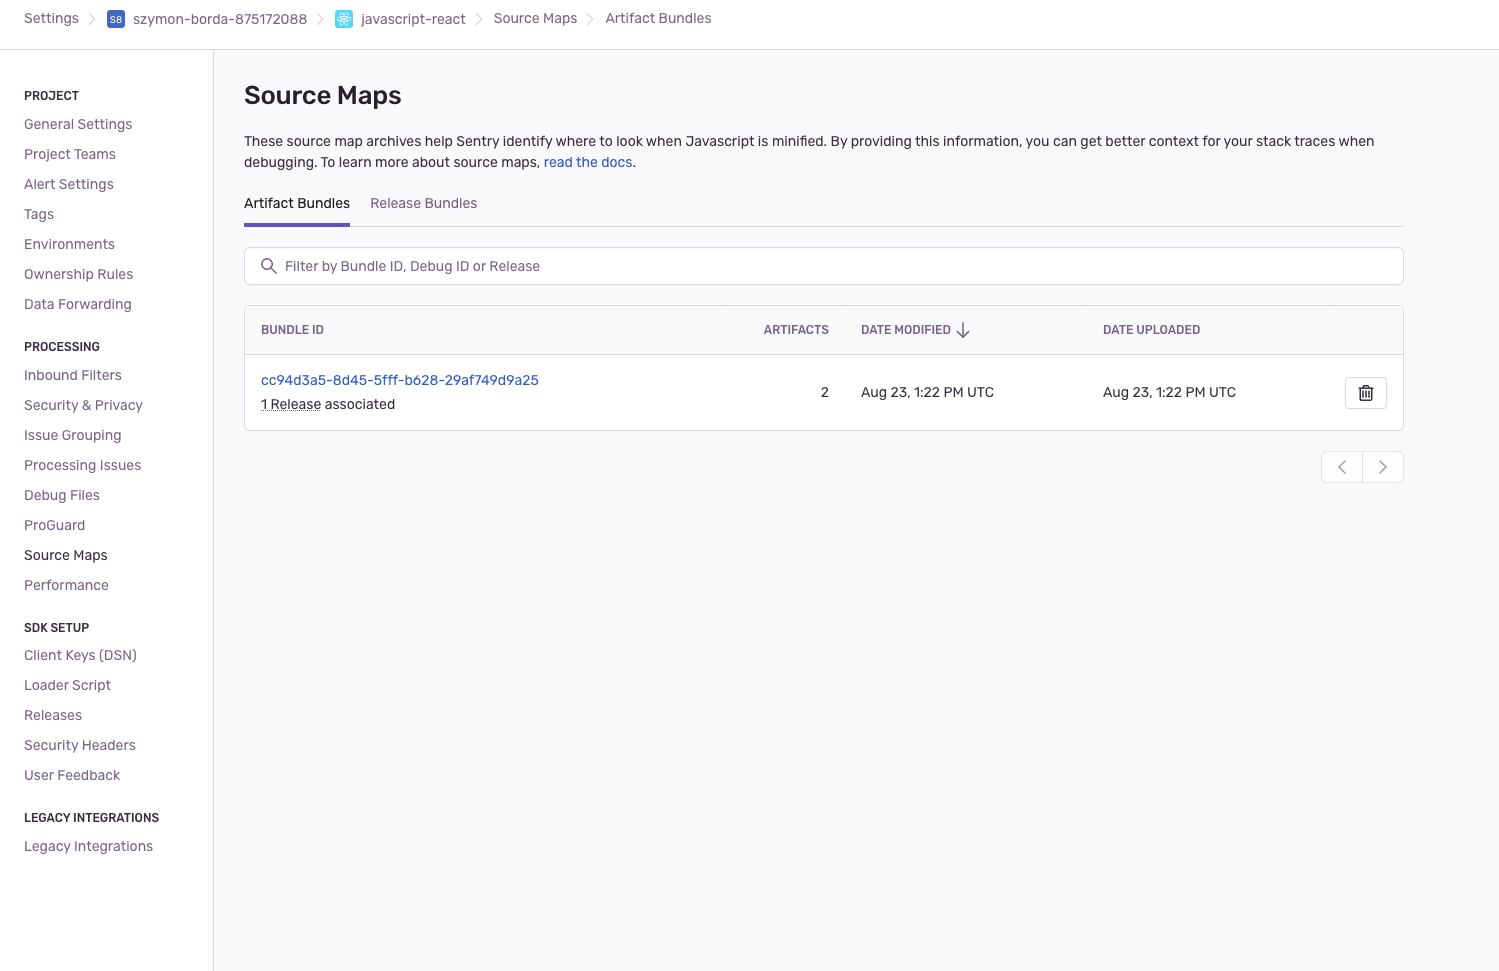
Now you should be able to see the release build in Sentry project settings:

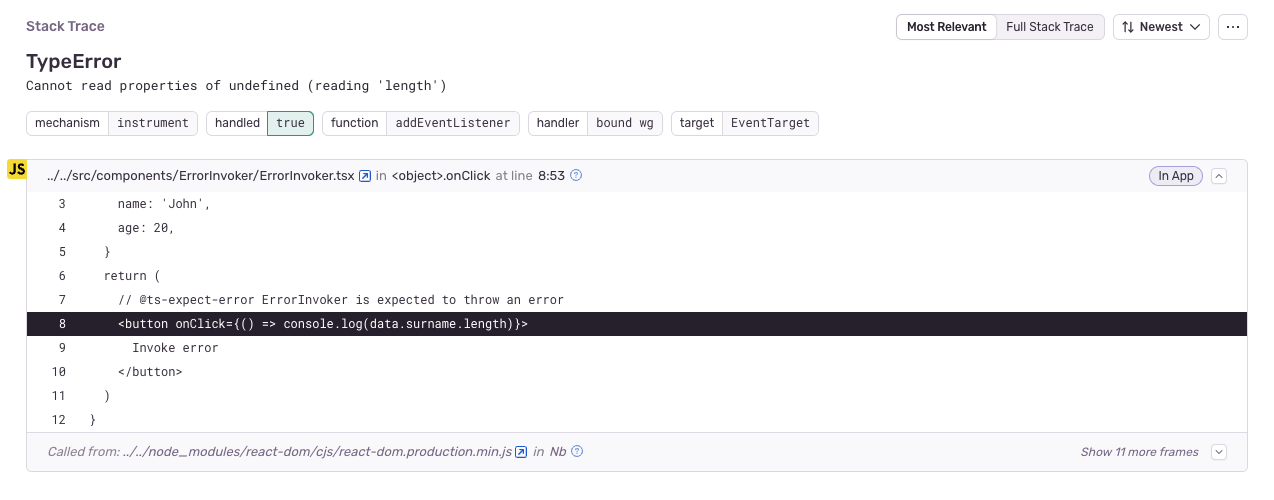
And after the deployment of the build, exploring stack traces of errors should now be much easier with references to the actual source code:
before:

after:

Summary
Errors in production are inevitable, so it is good to be prepared for them, and what's a better way to do so than to make them more readable? Source maps are a great tool that can help you improve your debugging process. They are fairly easy to implement and can save you a lot of time and frustration.
